Collard greens are a delicious and healthy addition to any garden. Being a member of the brassica family, it is related to broccoli, cauliflower and kale, and a rich source of vitamins A, C, and K, as well as calcium and iron. Growing your own collards is an excellent way to ensure their freshness and quality. In this article, we will go over the basics of how to grow collard greens.
Collard greens can be grown in most climates and seasonally according to your requirements. The ideal time to plant collards depends on the location of your garden. In many areas, collard greens can be grown year-round, thriving in the cooler temperatures of fall and winter. In warmer climates, they should be planted in the early spring or late summer to avoid scorching. Collard greens prefer cool and moist soil, so it is crucial to choose the right planting site and have appropriate soil preparation before planting.
Preparing the Soil
Before planting collard greens, it is important to prepare the soil properly. Here are the steps you should follow:
- Choose a sunny area: Collard greens need full sun for at least six hours a day. Choose an area of your garden that gets plenty of sun.
- Test the soil: Collard greens prefer a slightly acidic soil with a pH between 6.0 and 6.5. You can test your soil using a soil testing kit from your local garden center. If your soil is too acidic, you can add lime to raise the pH.
- Add compost: Work in a generous amount of compost to improve the soil’s texture and increase its nutrient content.
- Remove weeds: Remove any weeds from the area where you’ll be planting your collard greens. Weeds can be tough competitors for water and nutrients.
- Loosen the soil: Use a garden fork or tiller to loosen the soil to a depth of at least 6 inches. This will help collard green roots grow deeper and stronger.
Once you’ve prepared your soil, you’ll be ready to plant your collard greens and enjoy a bountiful harvest.
Choosing the Right Variety
Choosing the right variety of collard greens is crucial for a successful harvest. Here are a few things to keep in mind when choosing your variety:
- Climate: Different varieties of collard greens are better suited for different climates. For example, if you live in a warmer climate, look for varieties that are heat-tolerant and slow to bolt.
- Maturity: Some varieties of collard greens mature faster than others. If you want to get a quick harvest, look for fast-maturing varieties.
- Taste: Different varieties of collard greens have different levels of bitterness and sweetness. Choose a variety that suits your taste buds.
- Appearance: Collard greens come in different shades of green and have different leaf shapes. Choose a variety that looks appealing to you.
- Yield: Some varieties of collard greens produce a higher yield than others. If you’re looking to maximize your harvest, choose a variety that is known for high yields.
Here are some popular varieties of collard greens and their characteristics:
| Variety | Climate | Maturity | Taste | Appearance | Yield |
|---|---|---|---|---|---|
| Vates | Cool season | 50 days | Mild | Blue-green, smooth leaves | High |
| Champion | Cool season | 65 days | Mild | Blue-green, ruffled leaves | High |
| Flash | Warm season | 45 days | Mild | Dark green, smooth leaves | Medium |
| Georgia Southern | Warm season | 75 days | Bitter | Blue-green, crumpled leaves | High |
Remember to also consider your location and local climate when selecting a variety of collard greens to grow. By choosing the right variety, you’ll increase your chances of success and have a bountiful harvest.
Planting Collard Greens
Collard greens are a cool-season crop that is easy to grow and maintain. Here are some tips on how to successfully plant collard greens:
- Choose the right season: Collard greens are best grown in cool weather. They should be planted in early spring or fall, avoiding summer months when temperatures can get too high. In warmer climates, collard greens can be grown year-round.
- Prepare the soil: Collard greens thrive in well-draining soil that is rich in organic matter. Before planting, loosen the soil to a depth of at least 8-10 inches and add compost or aged manure to increase soil fertility.
- Planting seeds or transplants: Collard greens can be grown from either seeds or transplants. Seeds should be sown 1/4-1/2 inch deep and 18-24 inches apart. Transplants should be planted at the same spacing.
- Watering and fertilizing: Collard greens need regular watering to keep the soil moist, especially during the hot summer months. They also benefit from regular fertilization, so be sure to apply a balanced fertilizer every few weeks.
- Managing pests and diseases: Collard greens can be affected by pests such as aphids, cabbage worms, and flea beetles. To prevent damage, use organic pest control methods such as companion planting or insecticidal soap. Common diseases include clubroot and black rot, which can be prevented by rotating crops and maintaining good soil drainage.
| Season | Best Time to Plant |
|---|---|
| Spring | Late February to early April |
| Fall | Late July to early September |
Overall, collard greens are a hardy and nutritious vegetable that can be a great addition to any garden. With proper care and attention, you can enjoy a bountiful harvest of collard greens throughout the growing season!
Watering and Fertilizing
Proper watering and fertilizing are essential for growing healthy collard greens. Here are some tips to keep in mind:
- Water your collard greens regularly, especially during dry spells. Aim to keep the soil consistently moist, but not waterlogged.
- A good rule of thumb is to water deeply once a week, giving the plants around 1 inch of water. However, adjust the frequency and amount based on weather conditions and soil moisture levels.
- Mulching around the plants can help to retain moisture in the soil and reduce water runoff. Use organic materials such as straw, leaves, or grass clippings.
- Fertilize your collard greens with a balanced fertilizer before planting and then again every 3-4 weeks during the growing season. Use a fertilizer with equal amounts of nitrogen, phosphorus, and potassium.
- Alternatively, you can use compost or well-rotted manure as a natural fertilizer. Add a few inches to the soil before planting and top-dress the plants with compost as needed.
- Avoid over-fertilizing, as this can lead to excessive vegetative growth and a decrease in quality.
- If you notice any nutrient deficiencies, such as yellowing leaves, adjust your fertilization routine accordingly.
| Watering Frequency | Amount of Water |
|---|---|
| Weekly | 1 inch of water |
| Based on weather conditions and soil moisture levels | Adjust accordingly |
Remember, collard greens are heavy feeders and require adequate water to grow properly. By following these watering and fertilizing tips, you can ensure a bountiful harvest of healthy greens.
Protecting Your Plants
Once your collard greens have started to grow, it’s important to protect them from pests, diseases, and environmental stressors to ensure a bountiful harvest. Here are some tips on how to do it:
Keep pests at bay
Unfortunately, collard greens are a favorite of many pests, such as aphids, flea beetles, and cabbage worms. To prevent them from damaging your plants, you can:
- Spray the plants with a mix of water and dish soap or neem oil to repel insects.
- Place cut-up pieces of aluminum foil around the base of your plants to deter slugs and snails.
- Use row covers or netting to create a physical barrier that keeps pests out.
Prevent diseases
Collard greens are susceptible to a number of diseases, such as clubroot, downy mildew, and black rot. To minimize the risk of these issues, you can:
- Avoid planting collard greens in the same spot every year, as this can lead to a buildup of pathogens in the soil.
- Practice good sanitation by removing and disposing of any infected plants immediately.
- Water your plants at the base to prevent the leaves from getting wet, as excess moisture can promote fungal growth.
Address environmental issues
Collard greens need a consistent supply of water and nutrients to grow healthy and strong. Here are some tips to help them thrive:
- Water your plants regularly, especially during hot, dry weather.
- Add compost or fertilizer to the soil before planting and throughout the growing season.
- Mulch around the base of your plants to retain moisture and suppress weeds.
By taking these steps to protect your collard greens, you can help ensure a successful and rewarding harvest.
Harvesting Your Collard Greens
Once your collard greens have reached maturity, it’s time to start harvesting them. Here are some tips on how to do it:
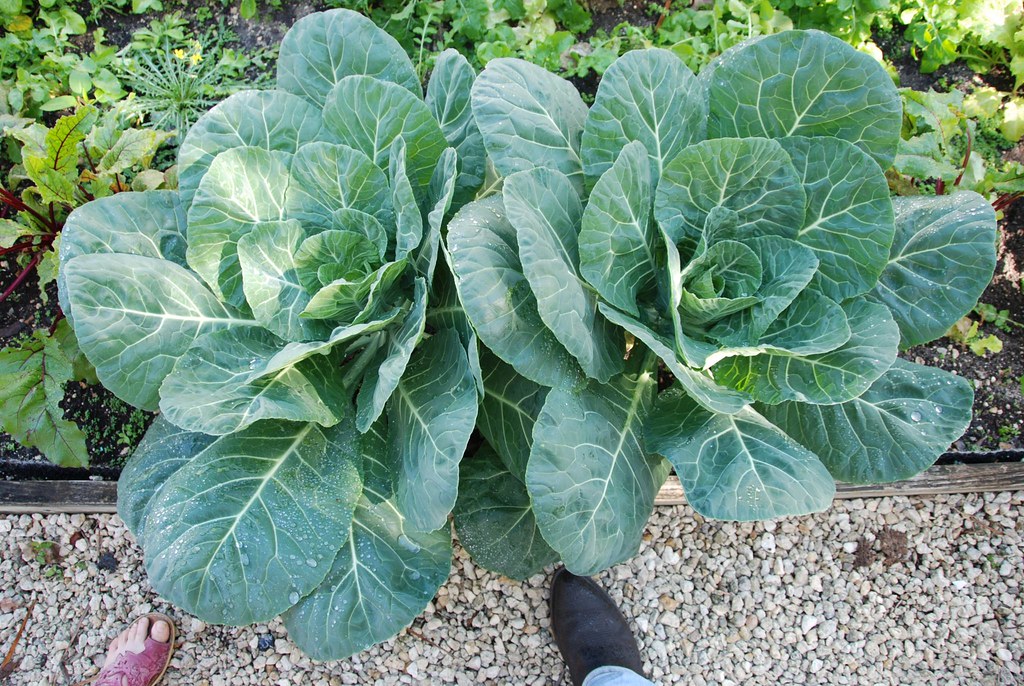
- Start harvesting once the leaves are large and dark green. They should be about the size of your hand or bigger.
- Use a sharp pair of scissors or garden shears to cut the outer leaves from the stem. Leave the inner leaves intact so they continue to grow.
- Cut the leaves at a diagonal angle to prevent water from collecting on the cut surface and causing disease.
- Harvest regularly to encourage new growth. As a general rule, you can harvest up to one-third of the leaves at a time without damaging the plant.
- If you want to harvest the entire plant, cut it off at the base just above the soil level. This will make room for new seedlings or other plants.
Remember that collard greens are a cool-season crop and can tolerate light frost, so you can continue to harvest them well into the fall. Just be sure to monitor the weather and protect the plants if temperatures are predicted to drop significantly.
Storing and Preserving
After harvesting your collard greens, it is important to store them properly to maintain their freshness and flavor. Here are some tips for storing and preserving your collard greens:
- First, remove any damaged leaves and wash the greens thoroughly in cold water to remove any dirt and debris.
- Next, shake off any excess water and allow the leaves to air-dry for a few minutes.
- Once the greens are dry, wrap them in a damp paper towel and place them in a plastic bag.
- Store the bag in the crisper drawer of your refrigerator and try to use the greens within 5-7 days.
If you have an excess of collard greens and want to preserve them for later use, you can also try freezing them. Here’s how:
- First, blanch the greens by boiling them in salted water for 2-3 minutes.
- Immediately after blanching, transfer the greens to a bowl of ice water to stop the cooking process.
- Once the greens are cool, drain them and pat them dry with a paper towel.
- Place the greens in a resealable plastic bag and remove as much air as possible before sealing.
- Label the bag with the date and store it in the freezer for up to 6 months.
By following these simple steps, you can enjoy your collard greens for weeks or even months after harvesting them.
Common Pests and Diseases
Collard greens are typically resistant to many pests and diseases, but they are still susceptible to a few common problems. Here are some of the most likely pests and diseases to affect your collard greens:
Aphids
Aphids are small, soft-bodied insects that can be green, yellow, brown, or black. They suck the sap from plant leaves, leaving them wilted and yellowed. To get rid of aphids, you can spray your collard greens with a strong jet of water or apply insecticidal soap.
Cabbage loopers
Cabbage loopers are green caterpillars that feed on the leaves of collard greens. They can cause significant damage to young plants, but they are easily controlled with insecticides or by handpicking them off the leaves.
Black rot
Black rot is a bacterial disease that causes dark, sunken spots on the leaves of collard greens. The disease can spread quickly and cause the leaves to wilt and die. To prevent black rot, plant disease-resistant varieties of collard greens and water them at the base to avoid getting the leaves wet.
Clubroot
Clubroot is a soil-borne disease that causes the roots of collard greens to become swollen and distorted. The leaves will wilt, turn yellow, and eventually die. To prevent clubroot, rotate your collard greens with non-cruciferous crops and avoid planting in overly wet or acidic soil.
Diamondback moths
Diamondback moths are small, gray-brown moths that lay eggs on the leaves of collard greens. The larvae will feed on the leaves, causing small, ragged holes. You can control diamondback moths with insecticides or by covering your collard greens with floating row covers.
While collard greens are generally easy to grow and care for, these pests and diseases can cause significant problems if left unchecked. By monitoring your plants closely and taking prompt action when problems arise, you can ensure a healthy and bountiful harvest of collard greens.
Troubleshooting Issues
Growing collard greens can be a rewarding experience, but it can also be frustrating when issues arise. Here are some common problems and how to troubleshoot them:
1. Slow growth or stunted plants
- Check soil pH levels and adjust between 6 and 7.5
- Ensure soil is well-draining and add organic matter if needed
- Ensure plants are receiving enough sunlight (6-8 hours per day)
- Consider adding nitrogen-rich fertilizer
2. Yellowing leaves
- Check for pests such as aphids or whiteflies and treat accordingly
- Adjust soil pH levels if necessary
- Ensure plants are receiving enough water and consider adding a balanced fertilizer
- Remove any damaged or diseased leaves
3. Wilting or drooping leaves
- Check soil moisture levels and adjust watering schedule as needed
- Ensure plants are not overwatered or underwatered
- Check for root rot or other diseases and treat if necessary
4. Holes in leaves or chewed leaves
- Check for pests such as caterpillars or slugs and treat accordingly
- Consider using organic measures such as neem oil or insecticidal soap
- Remove any damaged leaves or plants to prevent the spread of pests
By troubleshooting issues as they arise, you can ensure a successful collard greens harvest.
Conclusion
Growing collard greens requires patience, effort, and some basic knowledge about gardening. By following the steps we have outlined in this article, we hope that you will have a successful collard green harvest. Here are some takeaways from this article:
- Collard greens need well-draining soil and full sun exposure.
- Water the plants consistently to ensure healthy growth.
- Fertilize the soil with a balanced fertilizer before planting and as needed throughout the growing season.
- Keep an eye out for pests and manage them before they do too much damage.
- Harvest the leaves when they reach a desirable size and cook them as desired.
By following these tips, you can enjoy fresh, healthy, and delicious collard greens right from your garden. Remember, gardening takes practice, so don’t get discouraged if things don’t go perfectly the first time around. Keep at it, and you’ll be a pro in no time!
Happy gardening!
| Statistic | Number |
|---|---|
| Optimum soil pH range | 6.0-6.5 |
| Days to maturity | 55-75 |
| Average yield per plant | 1-2 pounds |
| Pests common to collard greens | Aphids, cabbage worms, flea beetles |